
New Finishes for Prime Labels
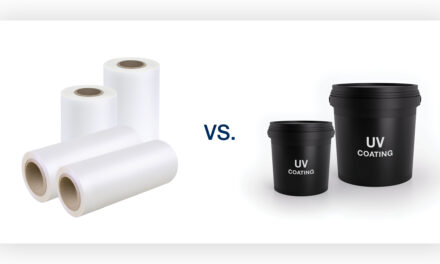
With Nobelus’ complete portfolio of unsupported films, prime label converters can offer their clients more finishing options than the label industry has seen before. A simple switch to wet lamination opens the door to a new world of haptic and visual value-add effects and even reduces material costs for basic gloss and matte laminates. However, label converters who have become accustomed to the myriad of issues with self-wound laminates – high material costs, limitations in finishes, and incompatibility with many types of embellishments – may view wet lamination as a collection of unknown risks. And if you’re a label printer who has recently adopted wet lamination into your workflow, you know that even a hugely beneficial change can come with its own set of obstacles.
Whether you have already implemented wet lamination and need some help overcoming a hurdle or are considering making the swap, this troubleshooting guide will help you better understand the wet lamination process and provide a starting point for correcting any issues that may crop up. Our strategic solutions experts have drawn from years of experience in the label industry and results from countless test runs to ensure you have the knowledge you need to reap the rewards of our unsupported films with complete confidence.
THE WET LAMINATION PROCESS
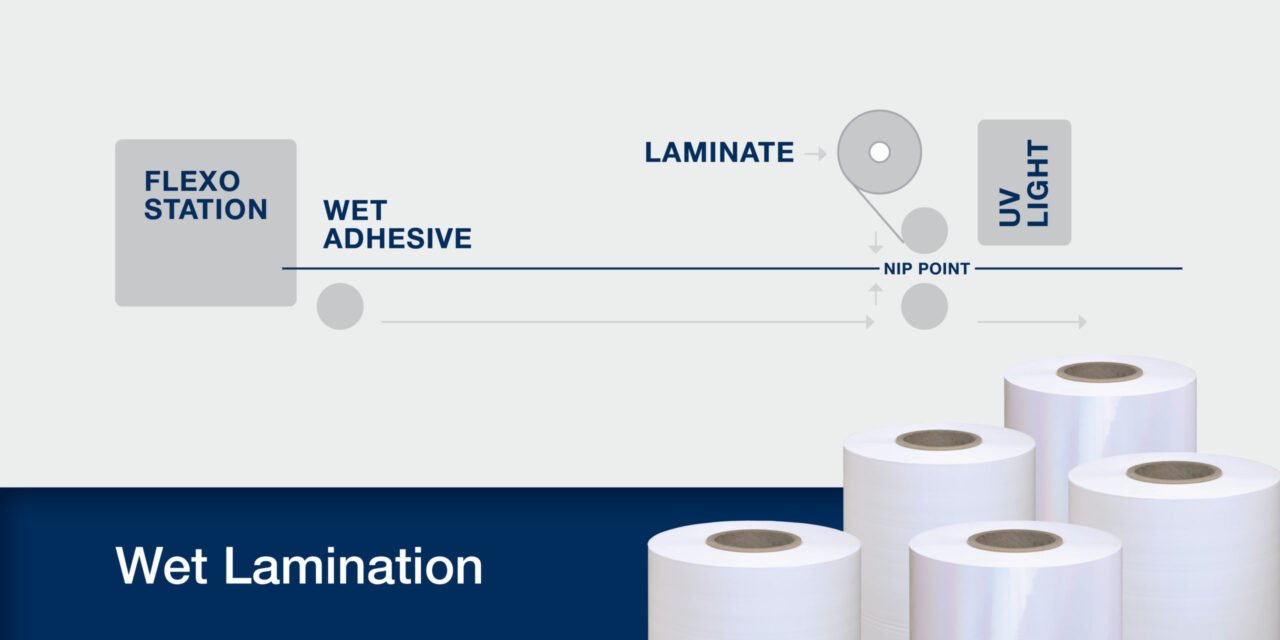
Although wet lamination as a method is far from new, label converters who have only recently implemented it may not be familiar with the minutiae. In a flexographic press that already uses UV or LED curing technology, very few adjustments are needed to make the existing workflow compatible with wet lamination. Still, a single variable malfunctioning has ripple effects throughout the rest of the process, which means trial and error may prove necessary to uncover the true reason behind a given issue. Wet lamination is accomplished through three straightforward steps, but it’s crucial to understand the function of each as these are the places from which issues are most likely to stem.
- Wet adhesive. Perhaps the biggest change when switching from self-wound laminates to wet lamination, wet adhesives are added to the final flexo deck on the press and metered out using an anilox roller and doctor blade. This step is completely in-line with the rest of production and enables facestock to receive a consistent coating of adhesive immediately after the ink is laid down. Unlike self-wound laminates, wet adhesives must be purchased separately from the laminate film. Nobelus has information readily available about adhesives that have been tested and approved for our films, but we expect many other types will prove compatible with field testing.
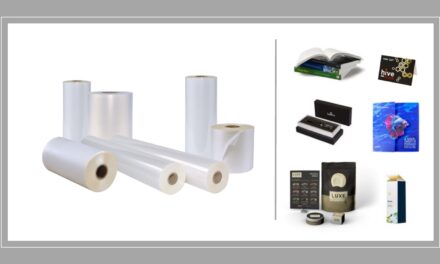
- Unsupported film. While self-wound laminates are mostly limited to gloss and matte and cannot receive certain post-laminate embellishments because they have a coating that helps them separate from pressure-sensitive adhesives on the roll, unsupported films come in a broad range of finishes and can receive a host of value-add effects. Nobelus’ unsupported films come on rolls just like self-wound laminates and fit onto the laminate mandrel the same way.
- UV/LED curing. The same technology used to cure inks and varnishes will cure wet adhesives and bond our unsupported films to facestock. Because wet adhesive is less expensive than purchasing laminates that already include an adhesive layer, the ability to cure wet adhesive within an existing step in the label production process results in incredible cost savings without any additional time commitment.
Types of Issues in Wet Lamination
Now that we have a good overview of each step in the wet lamination process, we can look at some specific examples of things that could go wrong. Typically, hurdles show up in three distinct areas: bond strength between laminate and facestock, where or how the wet adhesive is stored, and visual and tactile performance of the label post lamination. None of these issues are especially common, and many of the possibilities covered here are rare enough that many label converters will never encounter them. However, we know there is a learning curve for operators who are used to self-wound laminates, and it’s important to be aware of these issues on the off chance they arise.
Disclaimer: The following information is based on results from tests using proprietary adhesives from a Nobelus partner. Adhesives sourced from an unvalidated supplier may display issues not addressed here.
BOND STRENGTH
The most common issues that arise from wet lamination tend to concern film bonding improperly to the facestock. Explanations can range from inadequate maintenance of press components to uncured adhesive, so it’s vital to have a comprehensive understanding of your press’ operating conditions to pinpoint where the true problem lies. If you don’t know where to start troubleshooting, begin by asking a few general questions.
Question 1: Is the film facing the correct direction?
This is perhaps the most frequently seen issue for label converters who are new to wet lamination. Although our unsupported films have no adhesive layer, each roll still has a correct and incorrect side regarding application, which is denoted by each side’s dyne level. Dyne level refers to the amount of surface tension on any given film, and insufficient dyne levels on the adhesive-facing side of a film will prevent a strong bond from developing. The side of the film with the highest dyne level should always make contact with the adhesive to provide the strongest bond.
Contact our team to get information about where to find dyne solutions or dyne kits to keep the issue from reoccurring.
Question 2: Is the facestock bonding to the ink?
Sometimes other layers in the label can create bond issues rather than the adhesive. Try laminating the facestock without using ink. If the bond strength improves, the ink is the most likely culprit. Because there are so many possible combinations of ink, facestock, and adhesive, it’s difficult to create guidelines about which types are most compatible. Several trial runs may prove necessary before a workable solution is discovered, but things should progress smoothly afterwards.
Question 3: Is the adhesive curing completely under the UV lamp?
Several variables can be at play if the issue concerns inadequate curing of the adhesive, but the following three are the usual culprits.
- The run speed is too high. Slowing down the press gives the adhesive more exposure to UV light and increases the likelihood that it will cure thoroughly. This is an easy possibility to test, so it should always be tried before you start making adjustments to other press settings.
- The bulbs are causing issues. Improper maintenance of the bulbs or failure to replace them regularly can easily keep a wet adhesive from drying completely. Make sure that the lamp’s reflectors are clean as dirty reflectors can prevent even a new bulb from properly curing the adhesive. If the rest of the lamp is in good condition, investigate which type of bulb is being used and when it was last replaced. Non-LED bulbs can lose strength nonlinearly over time, so there may be no obvious signs that they need to be replaced apart from partially uncured adhesive. LED bulbs will operate at full power until they stop functioning entirely, but wet lamination requires bulbs that are 395 nm (nanometers) for proper curing. Some newer bulbs may be 365 nm.
- The adhesive coat weight is too high. In this scenario, too much wet adhesive has been applied to the facestock, leaving an uncured bottom layer of adhesive near the facestock where the UV light cannot reach. A doctor blade should also be used to ensure the adhesive is metered correctly for a consistent and accurate coat weight. Metal and polymer doctor blades can have different impacts on the coat weight, so switching out the blade may solve the problem.
Question 4: Is the adhesive layer too thin to bond with the unsupported film?
This is another issue that can have several contributing factors. In this case, they will all involve errors in how the equipment is maintained or calibrated.
- The anilox roller’s volume is insufficient. If the anilox’s volume is below the appropriate range for the facestock and film in question, the coat weight will be too light and there will not be enough adhesive on the facestock to hold the film securely. The doctor blade should also be checked to make sure the adhesive is metered in a consistent, targeted amount.
- The anilox needs to be cleaned. Over time, inks, coatings, and adhesives will build up in the anilox roller’s cells and reduce its BCM. It may seem time consuming to clean your aniloxes regularly, but it’s vital to keep them in pristine condition for best results in both printing and lamination. If you’re not sure how to approach maintenance, contact us for information about anilox cleaning services or reach out to your anilox provider for further guidance.
- The anilox needs to be replaced. Even with regular, diligent maintenance, an anilox roller’s cells will wear down over time, permanently lowering the BCM and gradually thinning out the adhesive layer. Be sure to keep a record of when aniloxes were last replaced to stay on schedule.
- The nip roller pressure is too high. Although this situation is rare, it’s possible for a high-tension nip roller to squeeze out the adhesive between the substrate and film. When this happens, the nip roller needs to be gradually adjusted until a proper bond is achieved.
Question 5: Is the adhesive being stored properly?
Improper storage conditions can affect the adhesive’s chemical composition and viscosity.
- Residue is reacting with the adhesive. If the same equipment is used for both varnishes and the adhesive, trace amounts of varnish can mix with the adhesive and weaken it. We recommend clients set aside equipment specifically for adhesives to prevent cross contamination. This includes dedicated pans, aniloxes, doctor blades, and tubes (if the adhesive is pumped in). If equipment cannot be dedicated strictly for adhesive use, each piece must be thoroughly cleaned before the adhesive is used to prevent issues.
- Adhesive is curing in the tubes when pumped. For systems that pump in adhesive, it’s possible for UV light to pass through the tubes and cure the adhesive before it reaches the deck. This reduces how much adhesive can make it to the deck and ultimately the facestock. To prevent curing, printers should use black or opaque tubes.
ADHESIVE STORAGE
Storage doesn’t affect the adhesive’s bond strength alone. If you’ve never used wet adhesives before, storing it between print jobs may not seem intuitive at first. Improper storage conditions can create a variety of issues with the adhesive’s viscosity and performance.
Issue 1: The adhesive is solidifying.
This can occur in two places: the flexo deck and tubes for pumping systems. In both instances, the adhesive is likely being exposed to enough UV light to cure over time. Adhesive in a pan should be covered by a secured black or opaque cover, such as a tarp or garbage bag. Likewise, tubes used to pump adhesive should be black or opaque in color. These storage methods will prevent UV light from reaching the adhesive and ensure it remains fluid throughout the week.
Issue 2: The adhesive is foaming.
While this rarely happens, contact with trace amounts of varnish can create a foaming effect in adhesives. If you’re having trouble with foaming adhesive, consider either setting aside dedicated pans, anilox rollers, and doctor blades strictly for the adhesive or cleaning each piece of equipment that comes into contact with the adhesive extremely thoroughly with an IPA or solvent wash.
Issue 3: The adhesive is too thick.
Although DBT Coatings’ adhesives are not especially viscous, cold conditions can affect their consistency, and adhesives from other sources may be more vulnerable to temperature changes. The suggested temperature range for LAM 5000 and LAM 6000, the adhesives DBT Coatings has specially formulated for Nobelus’ unsupported films, is 65 to 85 degrees Fahrenheit. Particularly cold facilities may need to stir adhesives regularly or use heated blankets to prevent them from thickening. On rare occasions, adhesives may crystallize when transported during the winter. As long as the adhesive is brought into the suggested temperature range before use, it should return to its proper consistency.
LAMINATION QUALITY
Once a customer adjusts to using a wet adhesive, issues with lamination quality should be few and far between. However, some trial and error may be necessary before ideal results are achieved.
Issue 1: The film is misting.
Misting occurs when the adhesive is not metered properly by the doctor blade at the anilox roller. When this happens, the coat weight becomes inconsistent on the facestock and affects the film’s ability to bond smoothly and consistently. DBT Coatings’ adhesives should not mist based on repeated testing, so this issue is more likely to arise if you are sourcing your adhesive from another company. After verifying your equipment is set up correctly, experiment with different adhesives or contact a Nobelus representative to learn more about adhesives guaranteed to work with our films.
Issue 2: The film is bubbling.
Bubbling may result from an issue with the nip roller. If the roller isn’t in good condition or isn’t placed properly, it may apply uneven or insufficient pressure, leaving pockets of air between the film and the facestock. Make sure the nip roller has seen regular maintenance and then adjust it gradually until ideal results are achieved.
Issue 3: The film is wrinkling.
While this issue is rare, sometimes it can be difficult to find the ideal tension settings for unsupported films at key points on the equipment. If the system is not adjusted with precision and consistency at each step, it can pull low-gauge films unevenly and result in wrinkles and overlaps.
OTHER CONCERNS
We’ve worked with a wide variety of label converters and understand that the biggest obstacles can sometimes lie in the planning stage. Switching to wet lamination may require a higher degree of thoughtfulness if you are accustomed to using one or two laminates for every project. To set yourself up for success and sizeable gains, take a look at our tips for creating a workable wet lamination strategy that fits your operation’s unique needs.
Is wet lamination as efficient as self-wound lamination?
While it’s certainly true that wet lamination can involve obstacles if you aren’t properly prepared, a few simple workflow adjustments can greatly reduce the physical and mental workload wet lamination requires. With self-wound laminates, it can be easier to switch between gloss and matte as the only moving piece is the film roll. In many cases, wet lamination will be equally as simple since many films are compatible with the same wet adhesive. However, switching to a more challenging film may require a change in adhesive, as well. Two simple solutions can be adopted to counteract this extra variable.
- Schedule print jobs according to the adhesives being used. The best way to save time and effort is to limit how often the film rolls and adhesives need to be changed. Make sure your press operators can easily access information concerning which adhesives are compatible with specific films and then schedule projects that use the same adhesive back-to-back.
- Dedicate equipment to each type of adhesive. Cleaning out a single deck multiple times throughout the day to change out the adhesive is highly inefficient and may even affect the adhesive’s performance. It’s wise to have separate equipment sets for each type of adhesive, including a pan, anilox, and doctor blade. Each of these parts can be quickly removed from the workflow and substituted with another adhesive or varnish, minimizing downtime between different runs. Additionally, dedicated adhesive pans can be covered overnight to ensure the adhesive is ready to use throughout the week.
The label will be used for a sensitive application.
In instances where you plan to produce labels for food-safe or pharmaceutical end use, be sure to provide us with information about the chemical requirements of the company or brand to ensure DBT Coatings’ adhesives meet their metrics. Nonstandard solutions can be pursued if an existing adhesive isn’t suitable for a specific application, but this may come with higher pricing. Adhesives sourced from other suppliers should be vetted before purchase to ensure they are appropriate for any given application.
WANT TO KNOW MORE?
If you need more targeted guidance to resolve an issue or prefer to speak to someone through email or phone, feel free to contact us. We’ll get you connected to a customer representative or service technician who can help get your press running at full speed again.